MCNi Training
Templates
Overview
Templates are used to hold a list of items that a certain customer or group of customers would purchase from you. The templates are currently managed via the website mcni360.com but will soon be managed with the iPad/iPhone app as well.
Creating a Template
Login to MCNi360.com and navigate to:
Maintenance->List->Template->Maintain
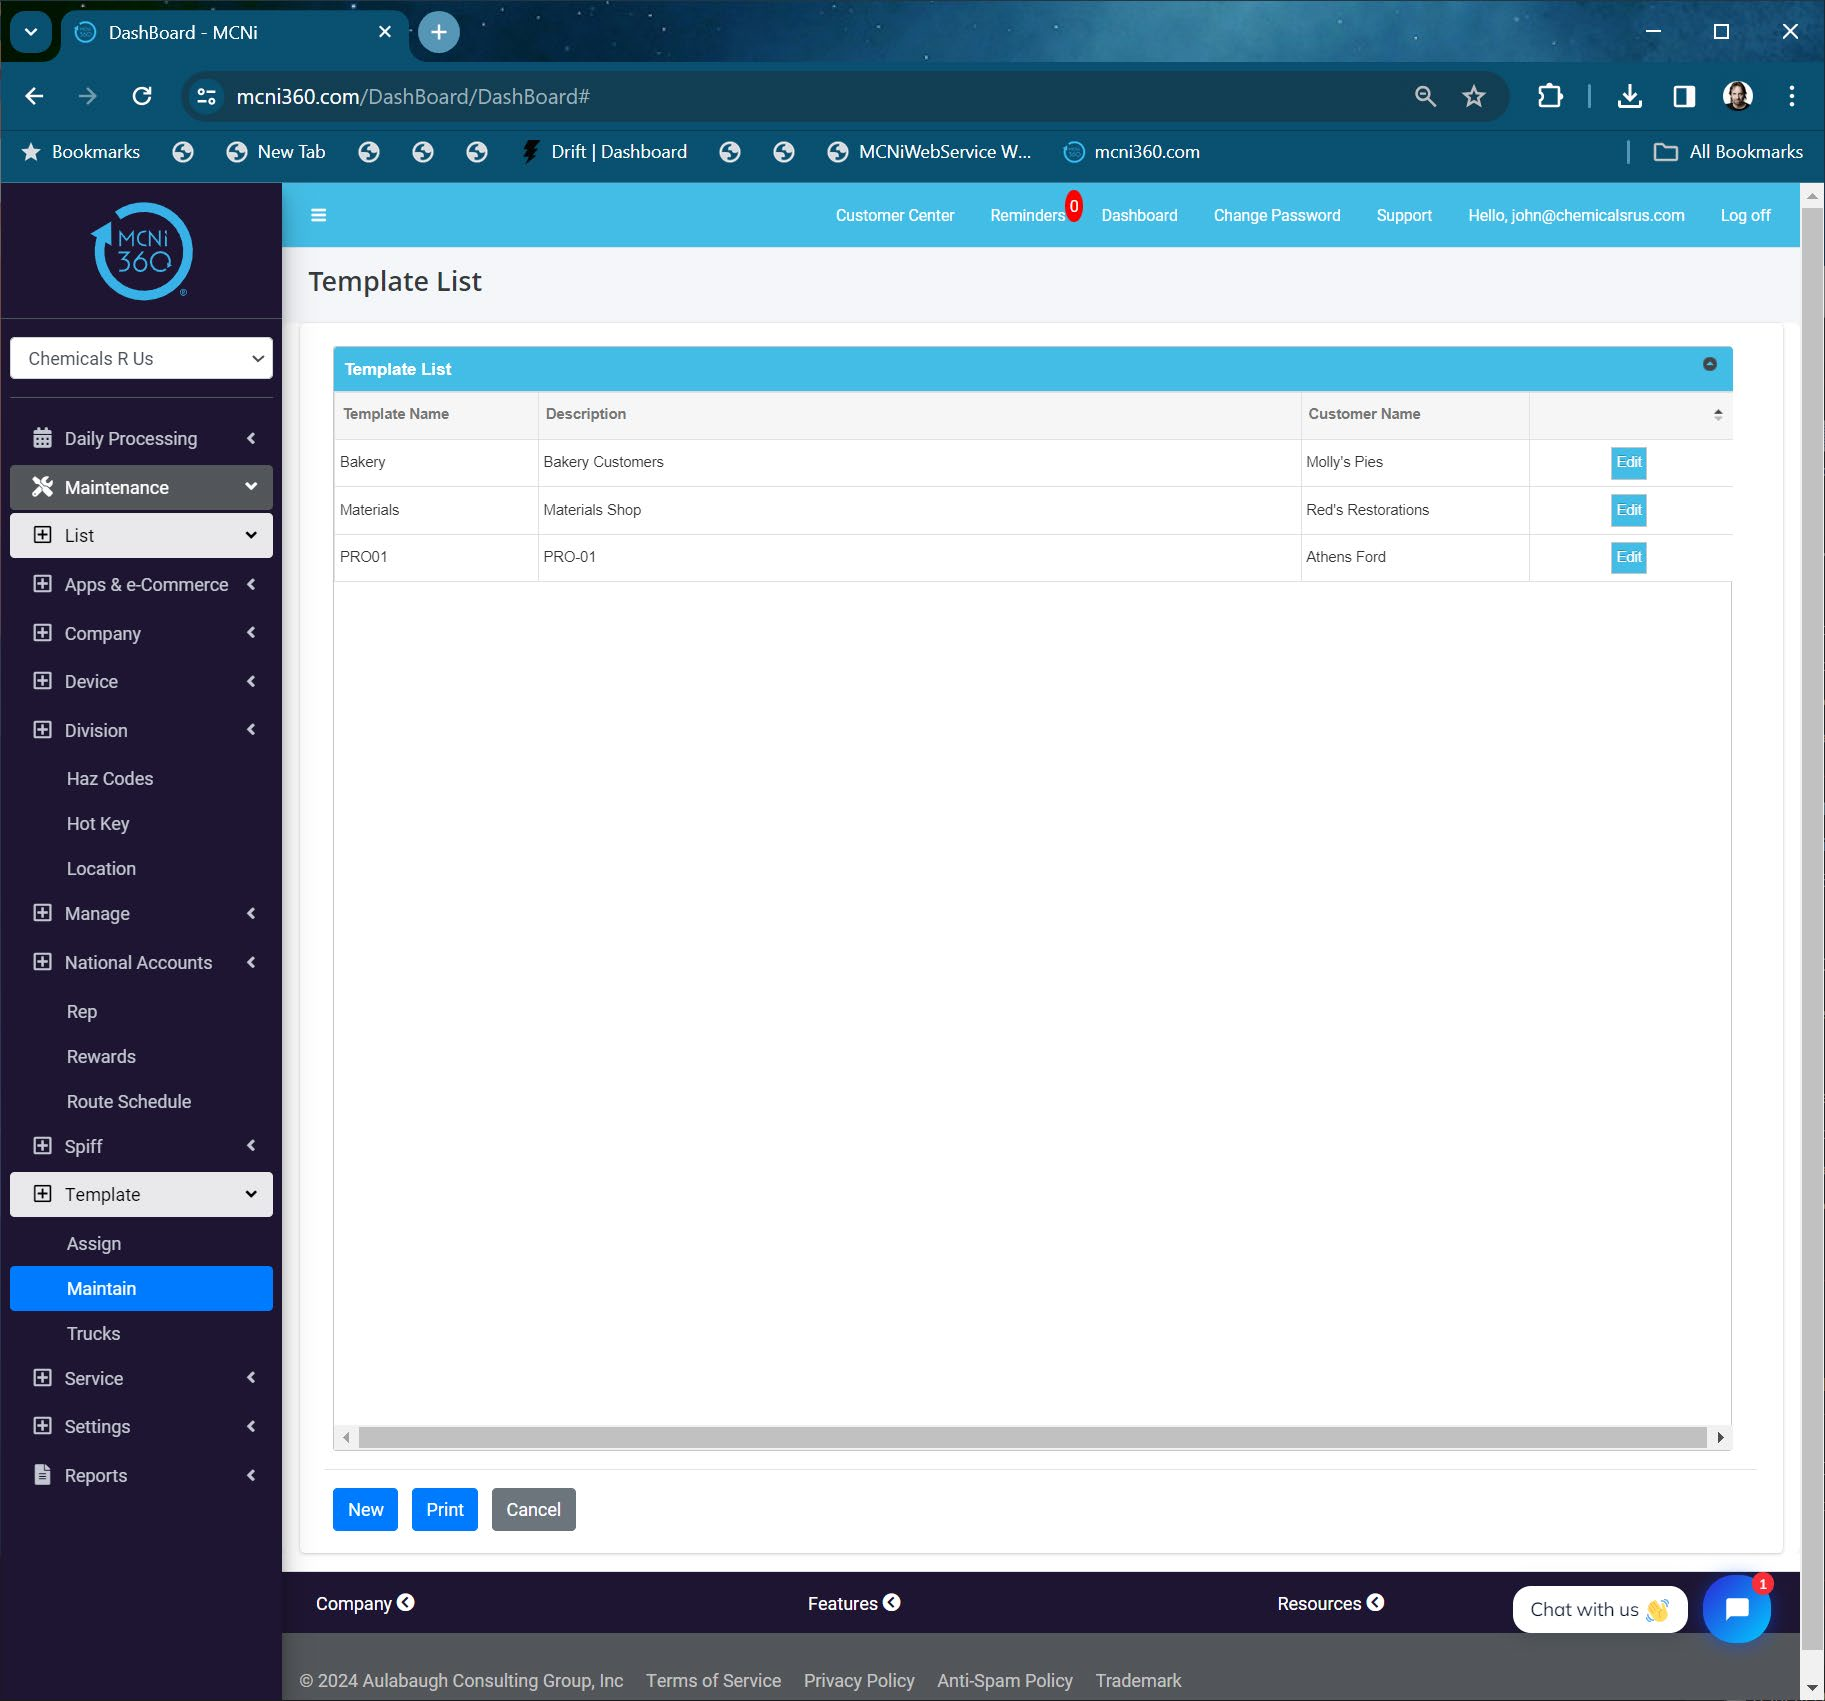
Modify an Existing Template
To modify an existing template, press EDIT on the row. To create a new template, click NEW.
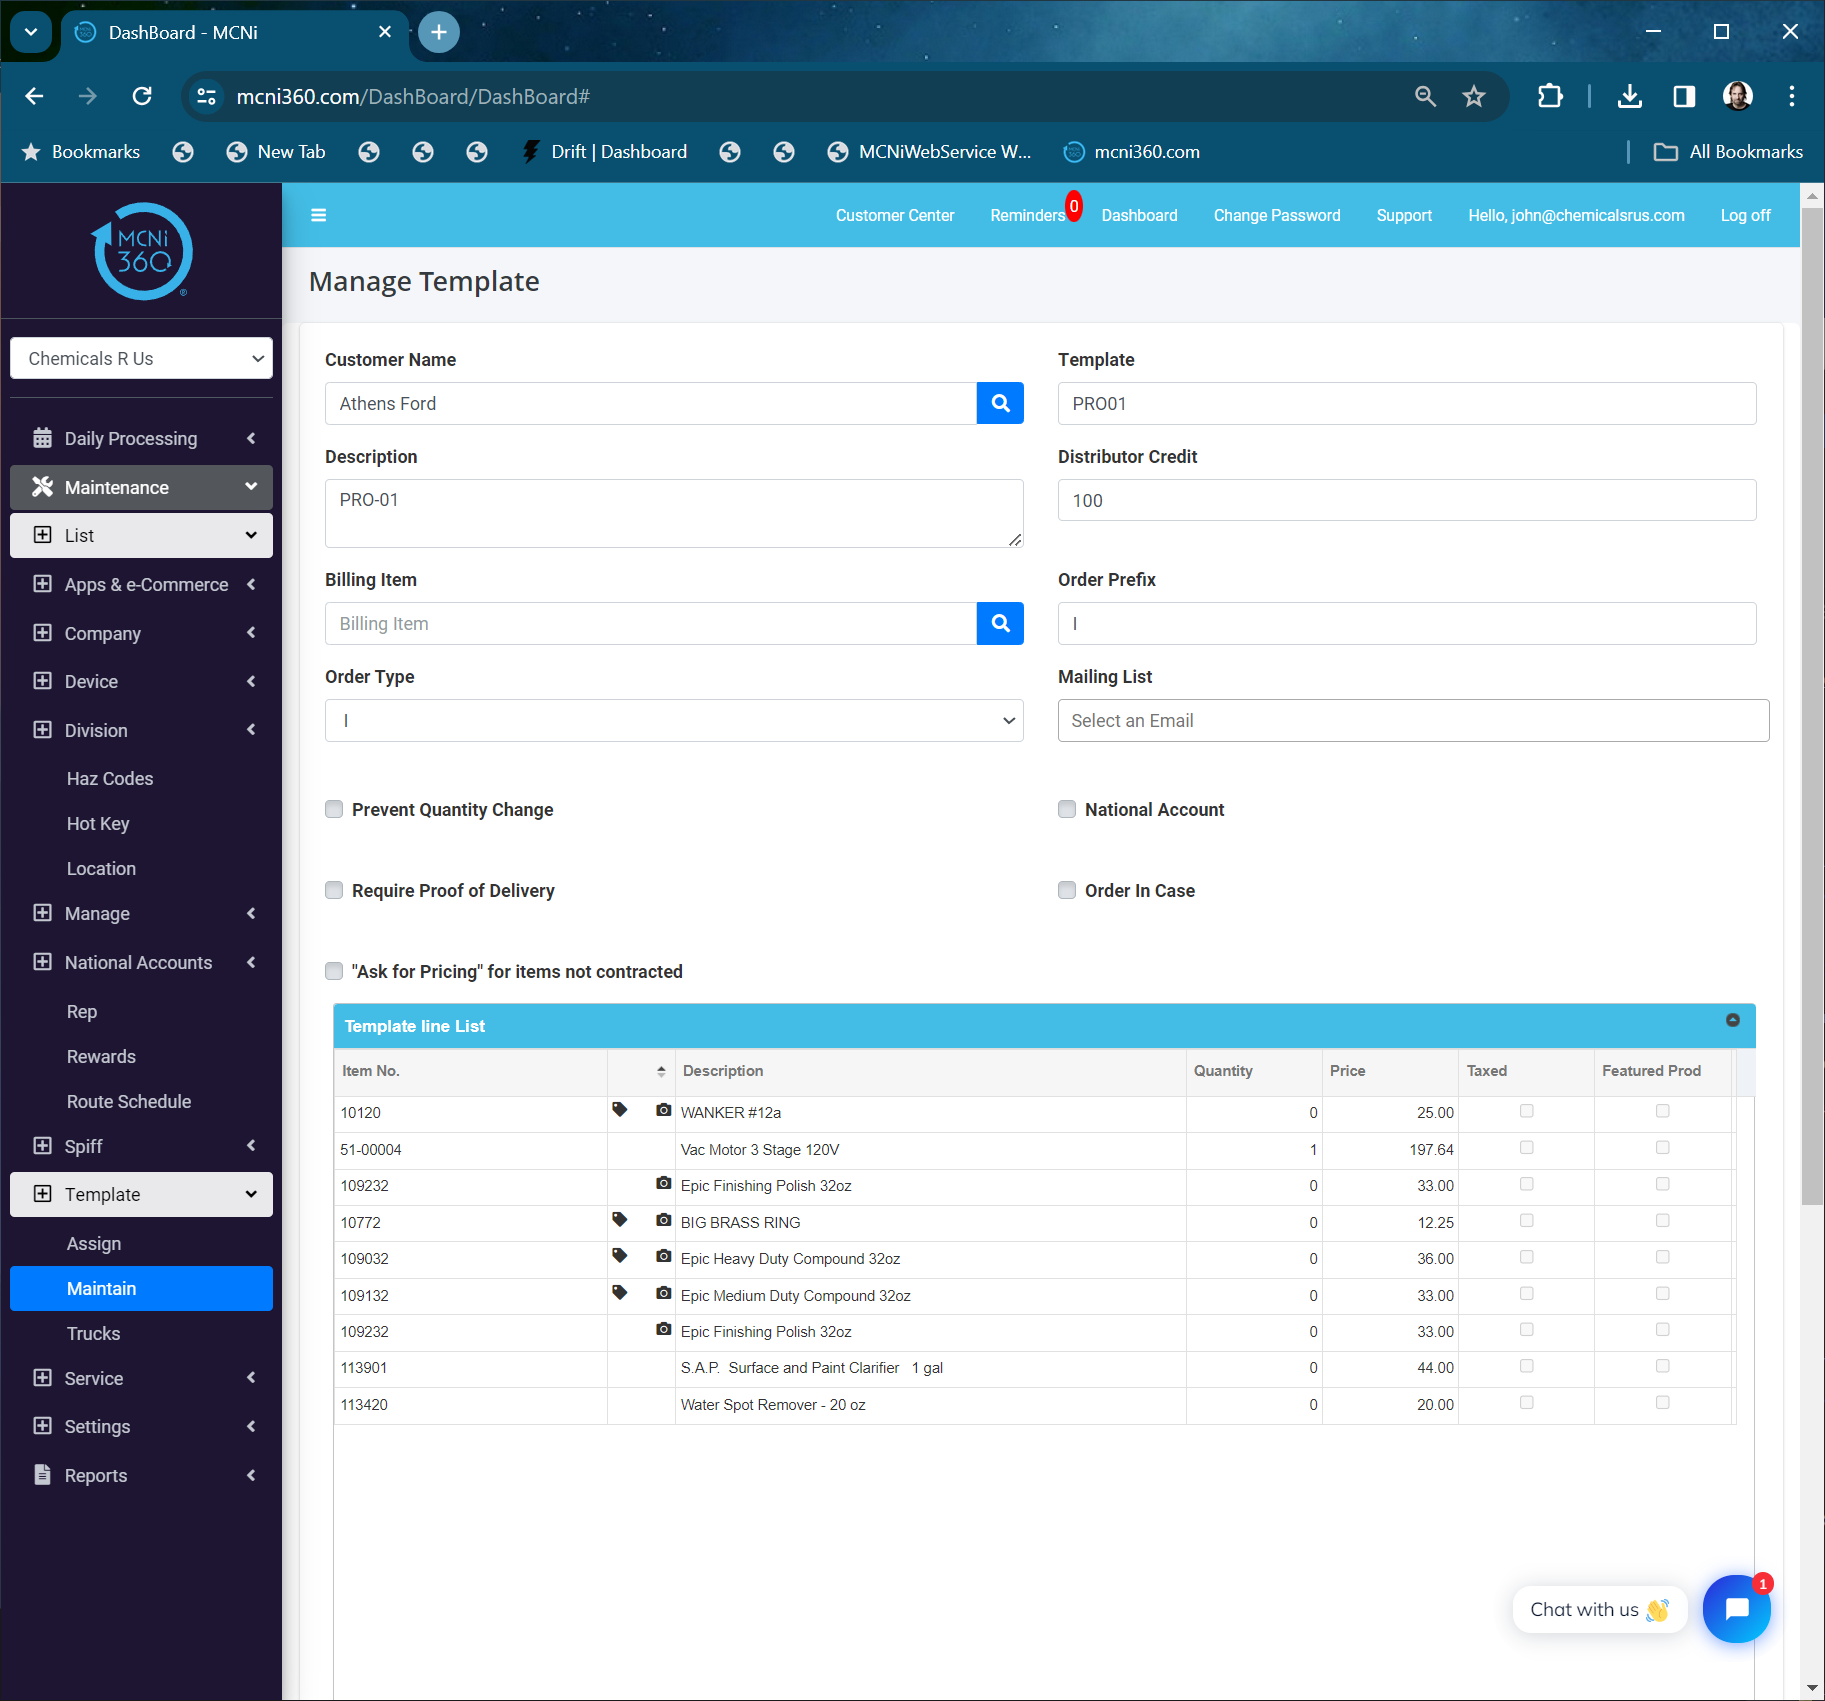
- Customer Name – select a customer that would be a candidate to use the template you are building. This is just an anchor for the template.
- Template – name the template so you will recognize it when searching.
- Description – Use this for any added information.
- Distributor Credit – this is not use with the mobile app, but must have a value. Make it 100.
- Billing Item - not used (use for national account processing).
- Order Prefix – not used but required, so make it I for Invoice.
- Order Type – not used but required, make it Invoice.
- Mailing List – not used
- Checkmarks – leave all unchecked. These are used in our B2C e-Commerce system.
Adding Items to a Template
Use the + buton at the botom-left corner of the grid. Search for the item you want and save it.
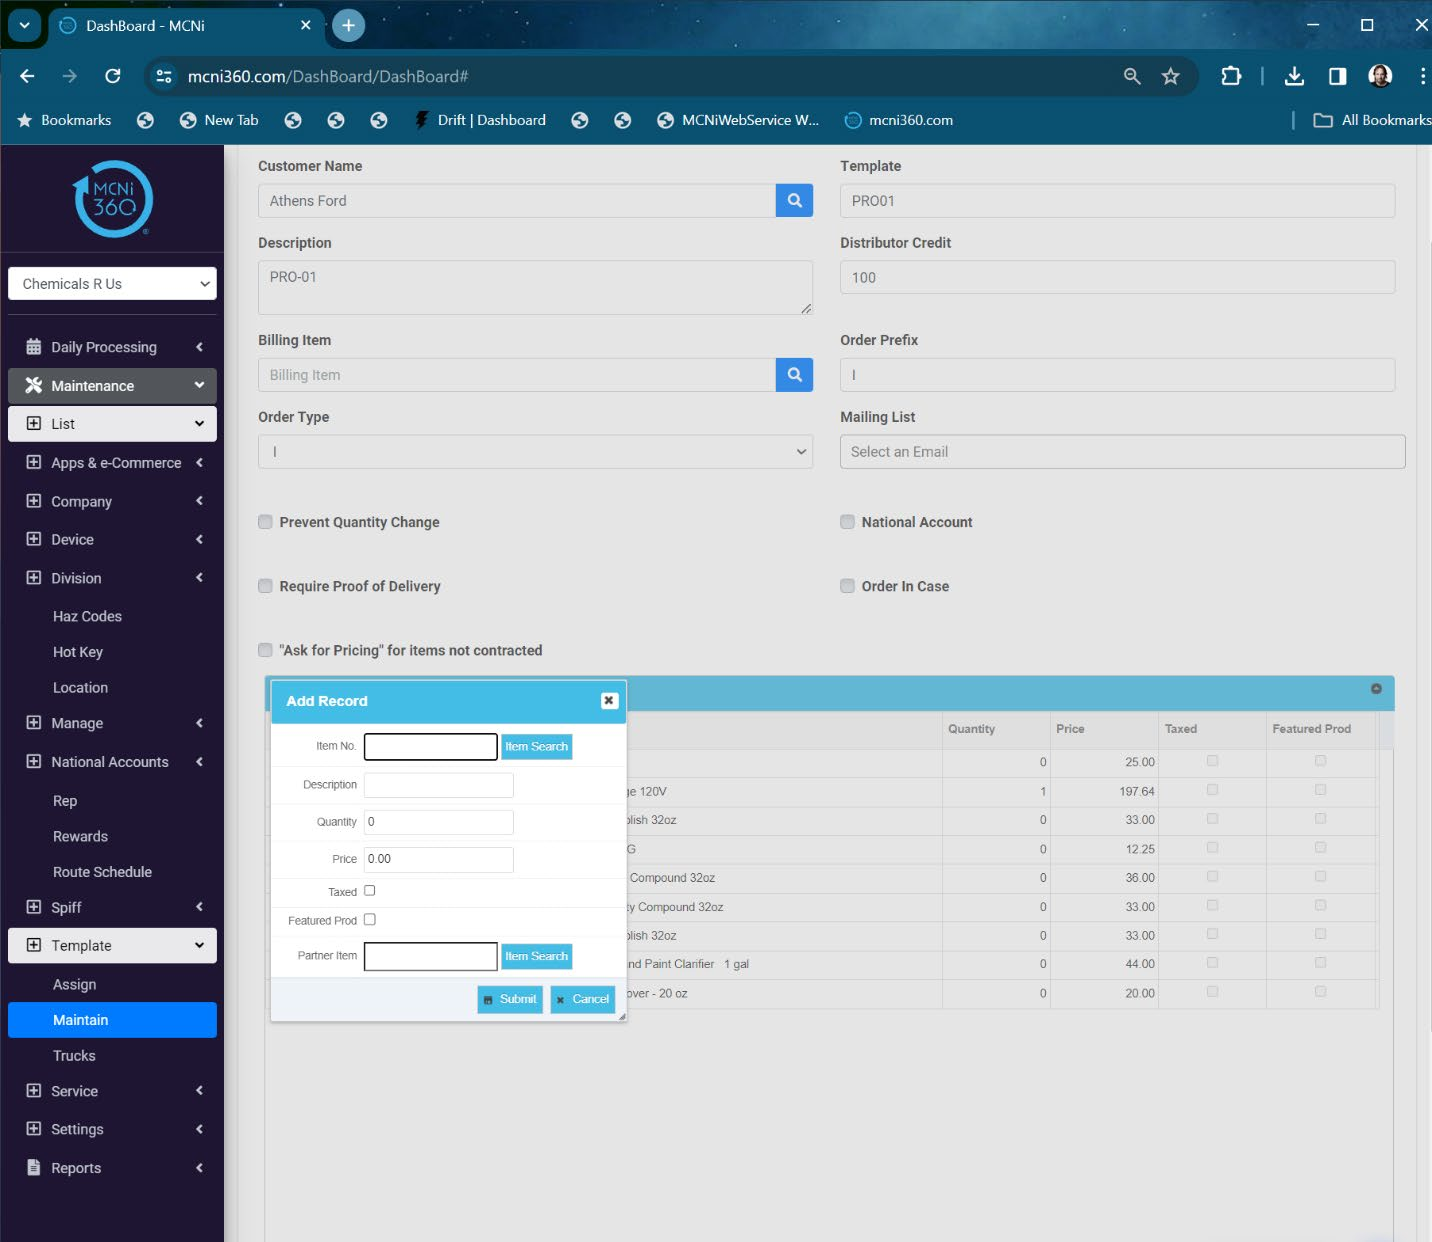
- Item No – the item number will show here when you select an item.
- Description – the description of the item you selected (auto-populated)
- Quantity – this defaults to zero so that the user can just populate how many the customer wants. If you put a quantity in this field, that quantity will show on the invoice. This iscommonly used for a surcharge, demurrage or trip/fuel charge.
- Price – This is the price the item will be sold for, but if you have a switch set on the device, it will use the contracted price for the item instead of the price in the template. We will address the switch in this document.
- Taxed – if the item is taxed or not.
- Featured Product – this is used for the e-Commerce app
- Partner Item – this is used for EDI translations
If you have the Function Control setting under Pricing named Use Contract Price for Template, then you can manage all of your pricing in,
Daily Processing - > Pricing -> Price Management
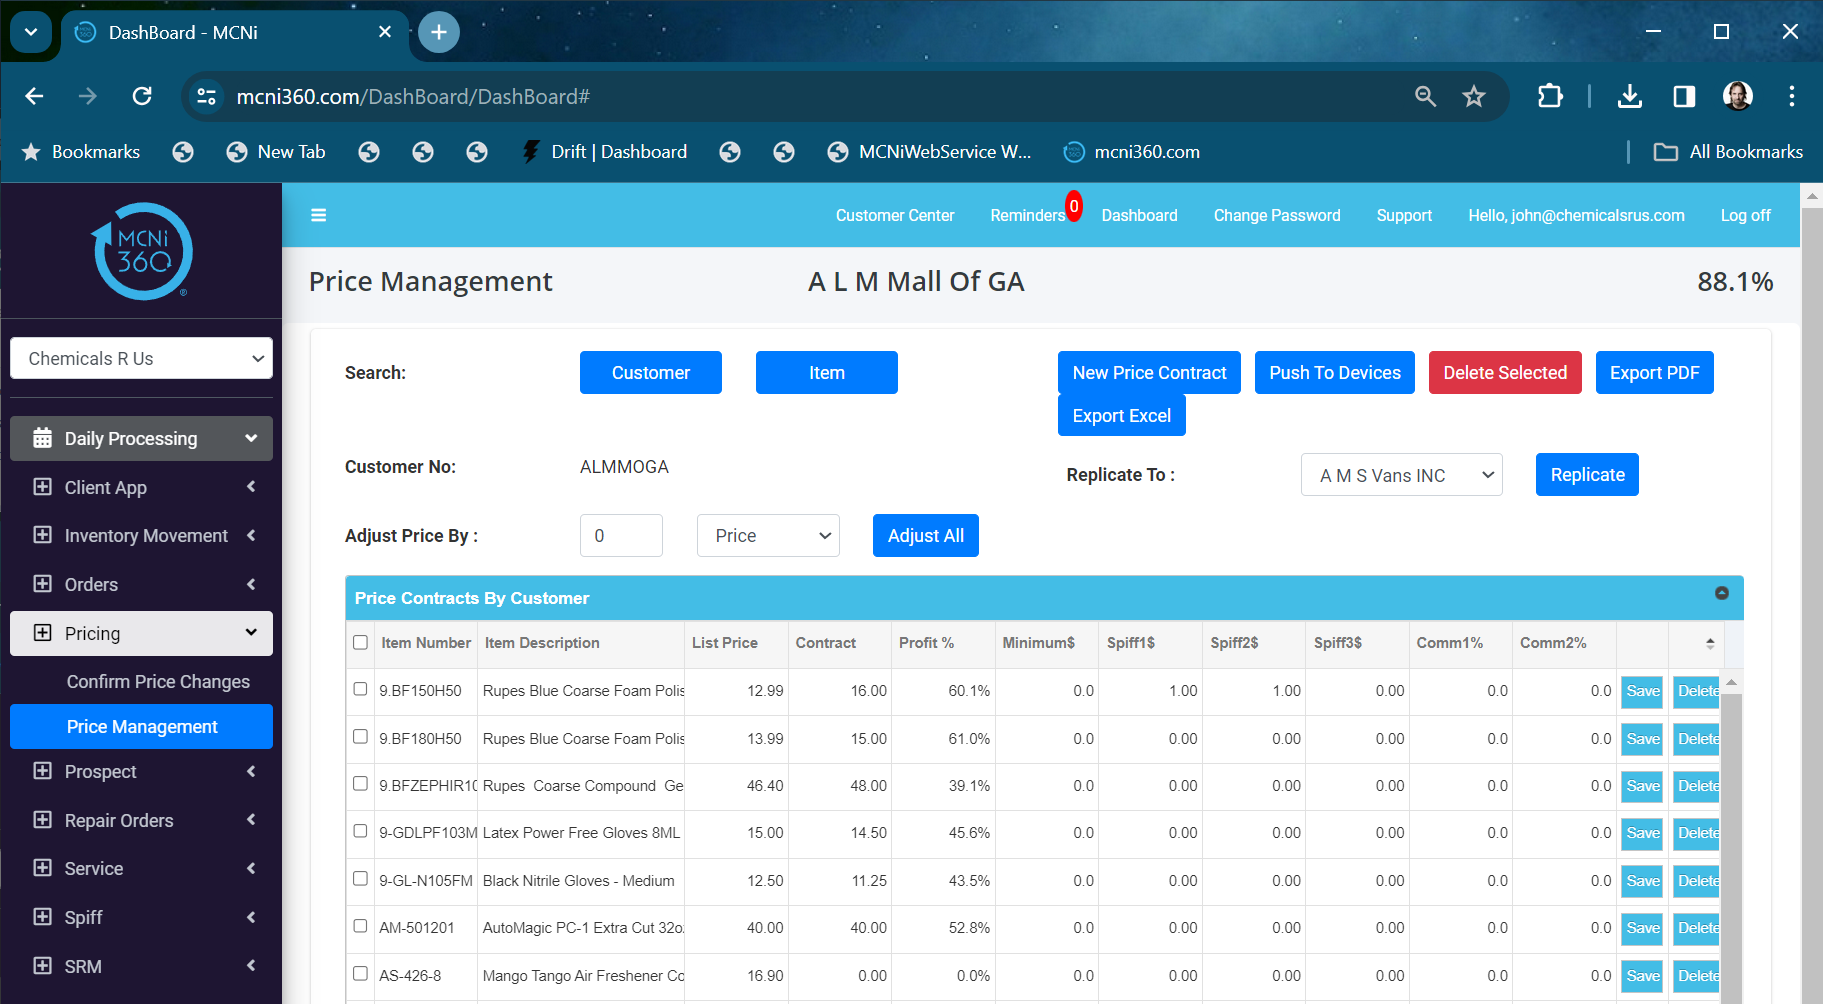
Price Management is addressed in a separate video
- NOTE: If you make changes to the templates, or pricing in Price Management, you will need to do a SYNC on mcni360.com to make the changes available to the mobile devices.
Assigning a Customer
Now that we have the template created and the pricing established for the customer in question, we need to assign the customer to this template. Go to:
Maintenange -> List -> Template -> Assign
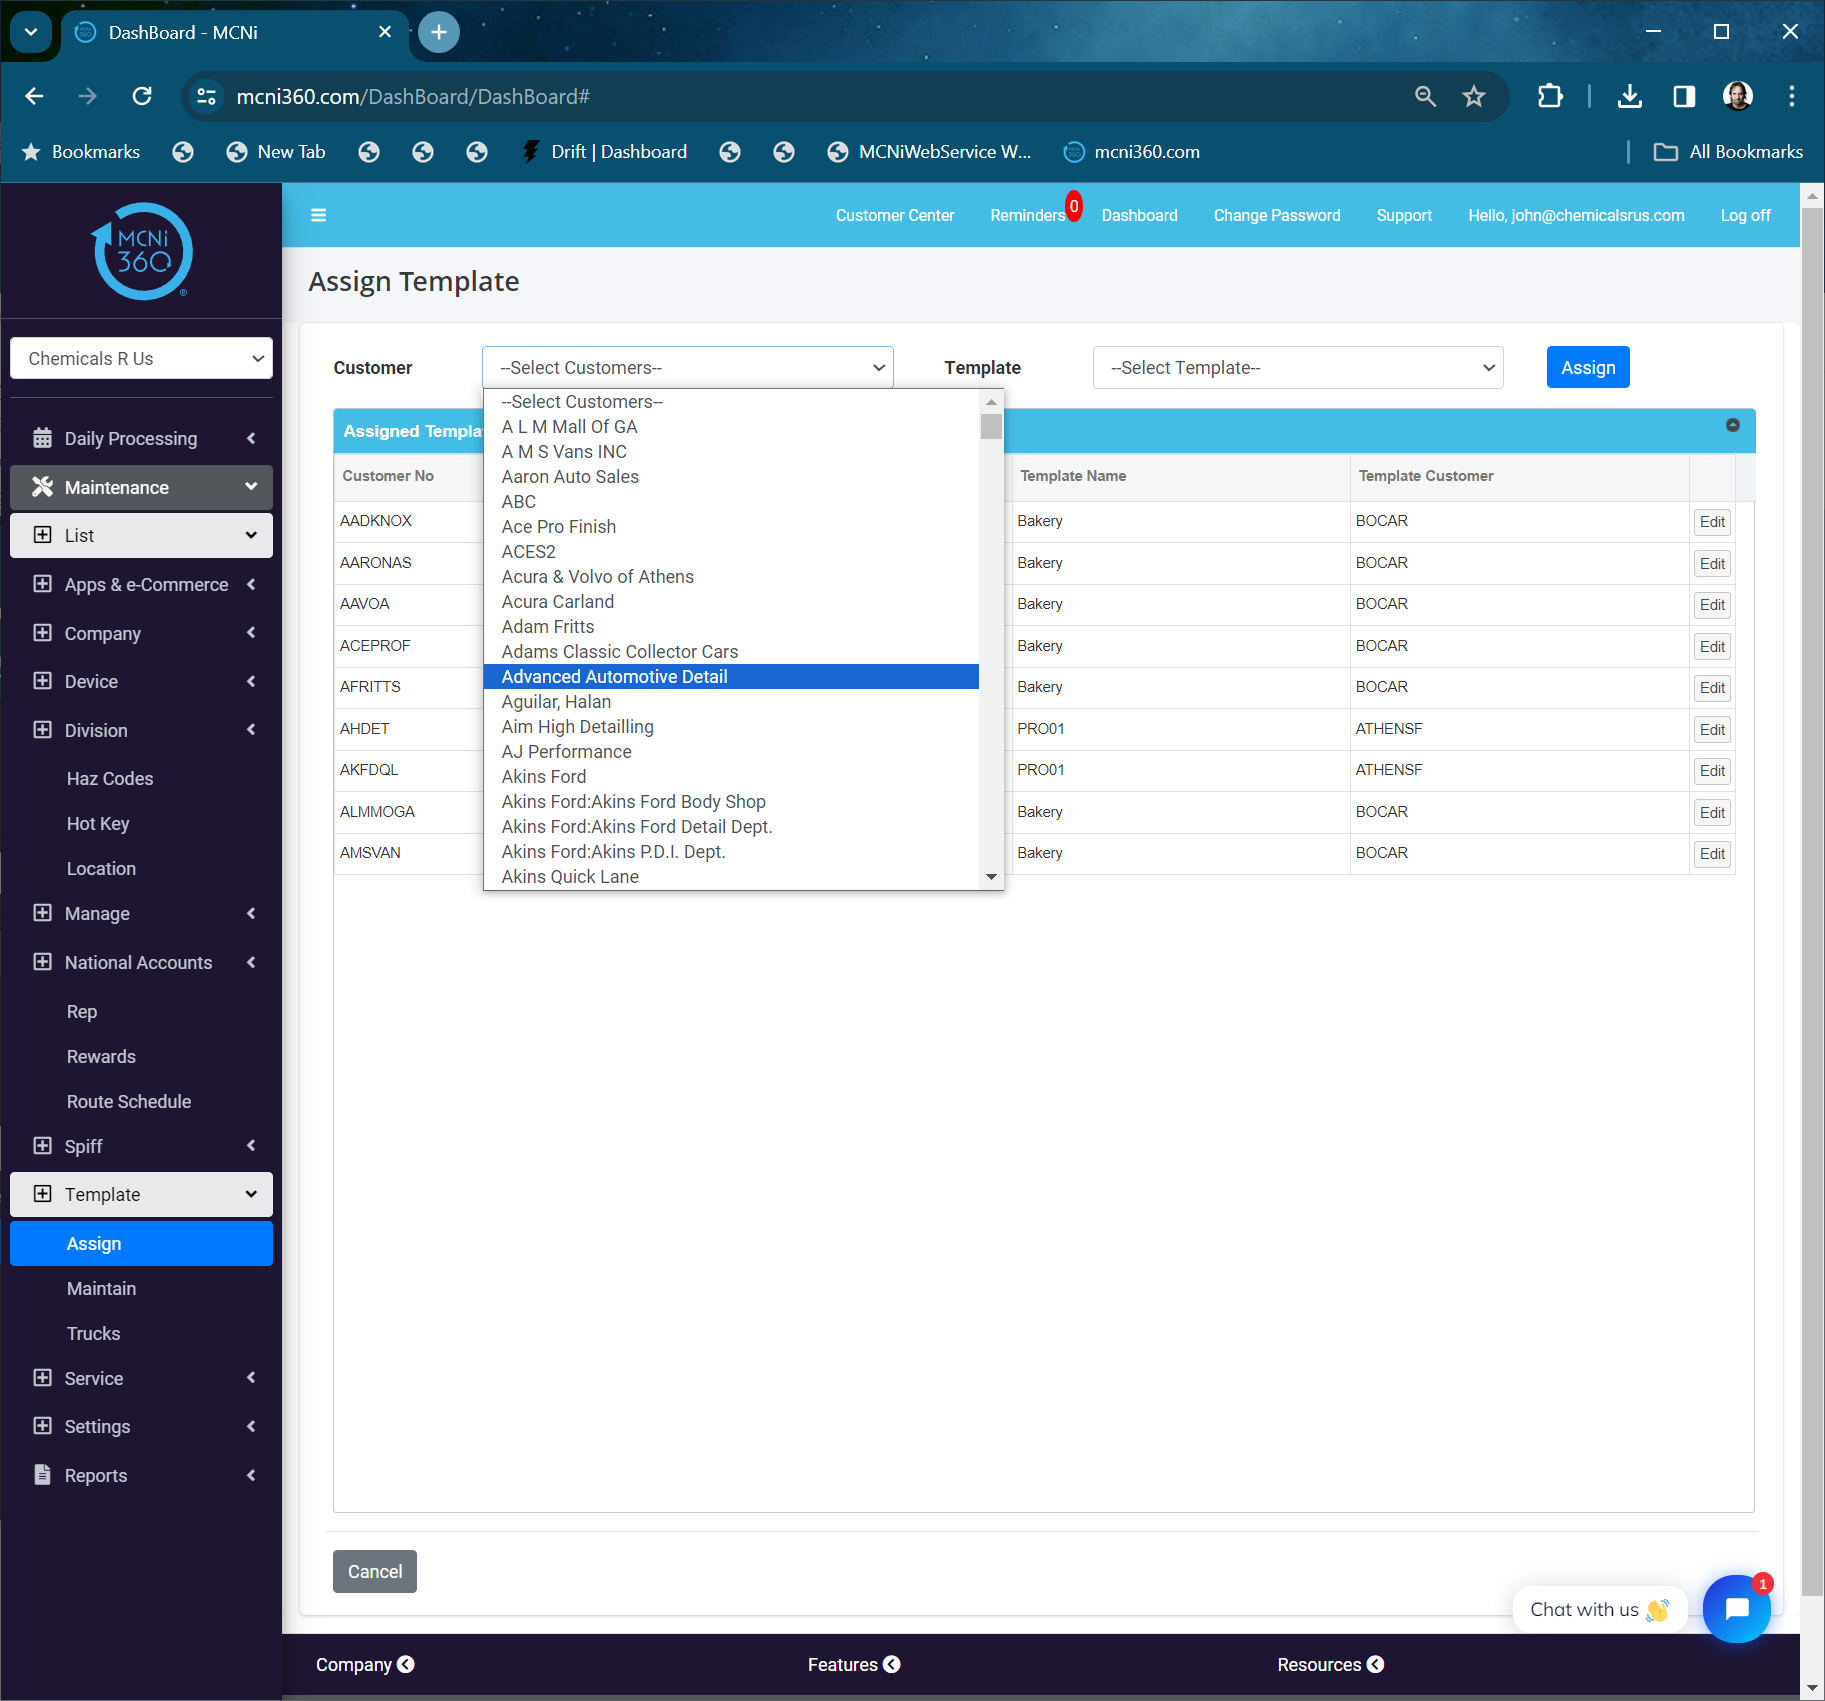
Select the customer you want to assign. Select the template you want the customer to use Click ASSIGN
Turn On Use Contract Pricing On the iPad or iPhone, click Settings->Function Control->Pricing Turn on Use Contract Price for Template
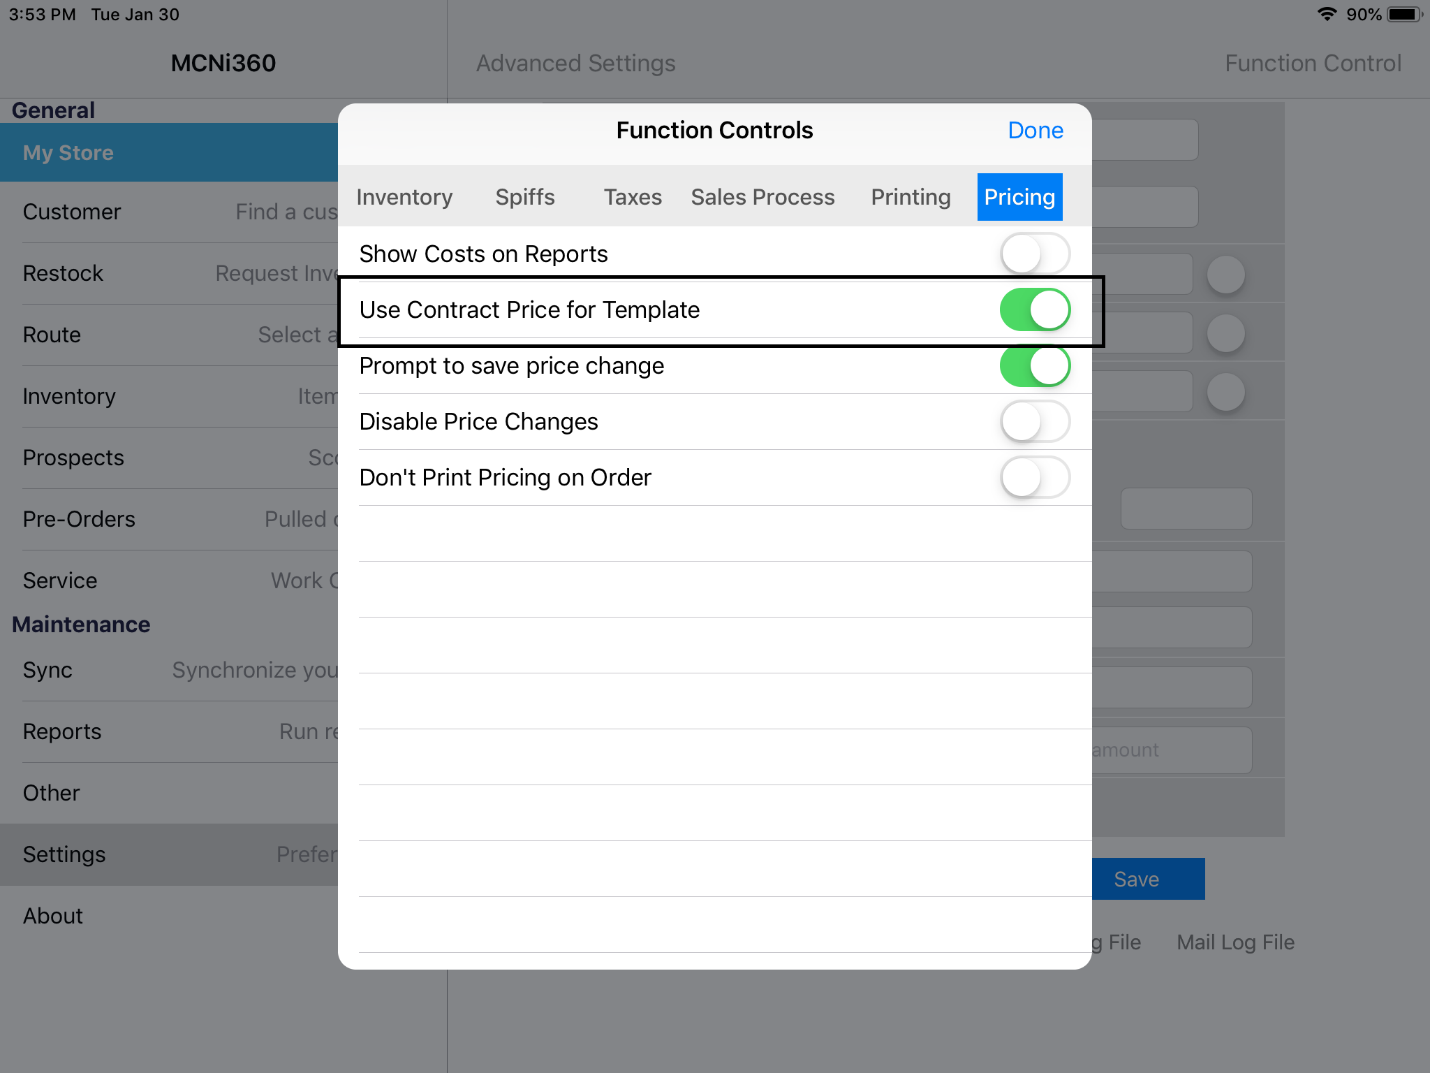
Click DONE and then SAVE.
Loading a Template
To load the template, select your customer and click INVOICE. Then, click Template/PreOrd

The items in the template will automatically load. Touch the item your customer wants to buy and enter the quantity.